Spooky Cookie Decorating Trends
Cookie decorating spooky – The art of spooky cookie decorating has evolved significantly, reflecting broader trends in Halloween aesthetics and baking techniques. This section explores emerging trends, stylistic shifts, and the comparative advantages of different frosting mediums.
Emerging Spooky Cookie Decorating Trends
Three prominent trends are shaping spooky cookie design for the upcoming Halloween season. Firstly, a move towards hyper-realistic designs is evident, with intricate details mimicking textures like decaying flesh or spiderwebs. Secondly, there’s a growing integration of pop culture elements, such as characters from popular horror movies or video games, into cookie designs. Finally, sustainable and ethically sourced ingredients are gaining popularity, aligning with broader consumer preferences.
Evolution of Spooky Cookie Designs

Source: lovetobeinthekitchen.com
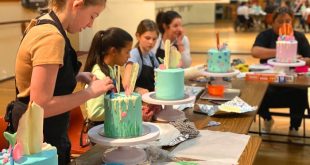
Over the past five years, spooky cookie designs have transitioned from simple, cartoonish representations to more complex and sophisticated creations. Early designs often featured basic ghost or pumpkin shapes, while current trends showcase intricate details, three-dimensional elements, and realistic textures. The use of airbrushing and advanced icing techniques has played a crucial role in this evolution.
Royal Icing vs. Buttercream Frosting
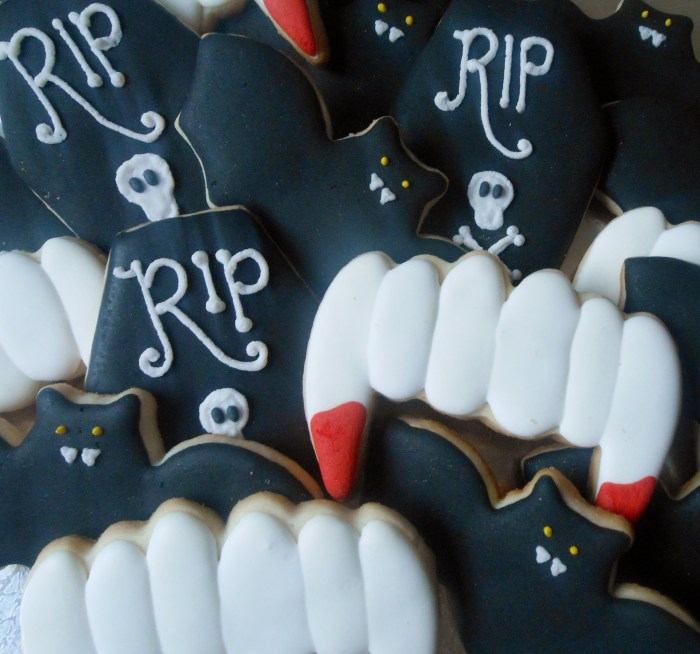
Royal icing and buttercream frosting each offer unique advantages for spooky cookie decoration. Royal icing provides crisp lines and sharp details, making it ideal for intricate designs and lettering. Buttercream, on the other hand, offers a smoother, more malleable surface suitable for creating textured effects and 3D elements. The choice often depends on the desired aesthetic and level of detail.
Spooky Cookie Decorating Trends Table
| Trend | Description | Materials | Difficulty Level |
|---|---|---|---|
| Hyper-realistic designs | Intricate details mimicking textures like decaying flesh or spiderwebs. | Royal icing, food coloring, airbrush, edible dusts | Advanced |
| Pop culture integration | Incorporating characters from horror movies or video games. | Royal icing, buttercream, cookie cutters, edible images | Intermediate |
| Sustainable and ethical ingredients | Using organic, locally sourced, or fair-trade ingredients. | Organic food coloring, fair-trade sugar, etc. | Easy |
| Metallic accents | Using edible metallic paints or dusts for a glamorous spooky effect. | Edible luster dusts, metallic airbrush colors | Intermediate |
| Ombre effects | Creating a gradual transition between colors for a soft, spooky look. | Royal icing, food coloring | Easy |
Spooky Cookie Design Techniques
This section delves into the techniques required to create intricate and visually striking spooky cookies. Mastering these techniques allows for the creation of truly unique and memorable Halloween treats.
Airbrushing Intricate Designs

Source: squarespace.com
Airbrushing allows for the creation of fine details and gradients, essential for achieving realistic textures and effects. The process involves thinning food coloring with alcohol, loading it into an airbrush, and carefully spraying it onto the cookie surface. Stencils can be used to create precise designs. Practice is key to mastering control and achieving consistent results.
Achieving a Realistic “Bloody” Effect
Source: cakecentral.com
Right, so I was mega into making spooky cookies, like ghosts and spiders, proper chilling vibes. Then I realised I needed more space for all my baking stuff, so I started looking at places like house phoenix rent for a bigger gaff. Anyway, back to the cookies – I’m thinking of trying some creepy crawly icing next!
A realistic “bloody” effect can be achieved using a combination of techniques. First, apply a base layer of dark red royal icing. Then, using a toothpick or small brush, create thinner streaks of brighter red, mimicking the flow of blood. Finally, add small droplets of darker red or even black for added depth and realism. Edible blood gels can also enhance the effect.
Creating Textured Surfaces
Three methods for creating textured surfaces include using embossing tools to create detailed imprints, applying edible glitter for a sparkling effect, and using a dry brush technique with edible dusts to create a slightly rough texture. The choice depends on the desired look and feel of the cookie.
Spooky Cookie Shapes and Cutting
Classic spooky shapes such as ghosts, bats, and pumpkins are easily achievable using cookie cutters. For more complex shapes, templates can be created and used as guides for cutting the dough. Ensure the dough is chilled sufficiently for easy handling and clean cuts.
Spooky Cookie Color Palettes and Icing Recipes: Cookie Decorating Spooky
Color palettes are crucial for establishing the mood and atmosphere of your spooky cookies. This section explores different color combinations and provides recipes for creating the perfect spooky icing.
Spooky Moods Through Color
An eerie mood can be created using muted greens, grays, and purples. A playful mood might incorporate brighter oranges, yellows, and pinks alongside spooky elements. A gothic mood would utilize deep blacks, reds, and purples with metallic accents. The possibilities are vast.
Deep Purple Royal Icing Recipe
Ingredients: 3 cups powdered sugar, 3-4 tablespoons meringue powder, 6-7 tablespoons water, deep purple food coloring. Instructions: Whisk together powdered sugar and meringue powder. Gradually add water, mixing until smooth. Add food coloring until desired shade is reached. Consistency should be thick enough to hold its shape.
Edible Spooky Decorations
Three examples include: Blood splatter (made with melted dark chocolate and red food coloring), cobwebs (made with melted white chocolate and piped thinly), and gravestones (made from rolled fondant, cut and decorated with edible markers).
Spooky Color Palettes Table
| Palette Name | Primary Colors | Secondary Colors | Suggested Cookie Design |
|---|---|---|---|
| Eerie | Deep purple, gray, muted green | Black, silver | Haunted house, graveyard scene |
| Playful | Orange, yellow, bright pink | Black, purple | Friendly ghosts, jack-o’-lanterns |
| Gothic | Black, deep red, dark purple | Silver, gold | Bats, skulls, gothic architecture |
Advanced Spooky Cookie Decorating Ideas
This section explores more complex decorating techniques, offering inspiration for creating truly impressive spooky cookies. It also addresses potential challenges and solutions.
Creating 3D Spooky Elements, Cookie decorating spooky
Miniature tombstones can be crafted from fondant, carefully shaped and detailed. Spiders can be made from black fondant or modeling chocolate, with tiny legs added individually. These elements add depth and visual interest to the overall design.
Multi-Layered Spooky Cookie Design
A multi-layered design might involve a base cookie decorated with a background scene (e.g., a graveyard), then layered with fondant elements (e.g., tombstones), and finally detailed with icing accents (e.g., cobwebs).
Challenges and Solutions in Advanced Decorating
Three common challenges are: (1) Achieving consistent airbrushing, solved by practice and using stencils; (2) Maintaining the structural integrity of 3D elements, solved by using sturdy materials and proper drying techniques; (3) Creating realistic textures, solved by using various tools and techniques such as embossing and dry brushing.
Complex Spooky Cookie Design Example
A complex design might feature a haunted house cookie. Steps involved:
- Bake and cool a large rectangular cookie.
- Create a haunted house scene using royal icing: a dark gray house with black windows and a spooky moon.
- Add fondant details such as a chimney and doors.
- Airbrush a foggy effect around the house.
- Add small 3D elements such as miniature tombstones around the house.
- Finish with edible glitter for added sparkle.
Packaging and Presentation of Spooky Cookies
The presentation of your spooky cookies is as important as their design. This section offers suggestions for packaging and enhancing the overall aesthetic appeal.
Right, so I was totally buzzing, decorating spooky cookies, like, ghosts and spiders and stuff. Then I thought, “Imagine having a wicked Halloween party in a mega gaff,” so I checked out some houses for rent atlanta , for a proper spooky vibe. Anyway, back to the cookies – I’m gonna ice them with proper blood-red icing, innit?
Packaging Options
Options include cellophane bags, decorated boxes, or even reusable tins. Consider the size and fragility of the cookies when choosing a packaging method. Clear packaging allows the cookies to be fully visible, while opaque packaging adds an element of mystery.
Creating Visually Appealing Packaging
Decorate boxes or bags with spooky-themed ribbons, stickers, or custom-printed labels. Use themed tissue paper or shredded paper to add to the presentation.
Incorporating Spooky Elements
Themed ribbons, tags with spooky messages, and tissue paper with Halloween designs can enhance the presentation. Consider adding small, edible decorations to the packaging itself.
Spooky Cookie Presentation Example
A set of spooky cookies could be presented in a black gift box with a purple ribbon. Inside, the cookies are arranged on a bed of black shredded paper. A small tag with a spooky message is attached to the box.
- Black gift box
- Purple ribbon
- Black shredded paper
- Spooky message tag
- Cookies arranged artfully
Essential FAQs
What are some common mistakes to avoid when decorating spooky cookies?
Over-piping icing, leading to uneven surfaces; using incorrect consistency of icing; insufficient drying time between layers; improper storage causing cookies to become soggy.
Where can I find high-quality edible spooky decorations?
Specialty baking supply stores, online retailers specializing in cake decorating supplies, and some craft stores often carry a variety of edible decorations suitable for spooky cookies.
How long do spooky cookies typically last?
Properly stored in an airtight container at room temperature, spooky cookies can last for up to a week. Cookies with high moisture content (like those with buttercream) may need to be refrigerated.
Can I use food coloring pens to add details to my spooky cookies?
Yes, food coloring pens are excellent for adding fine details and intricate designs to spooky cookies after the icing has dried.